 |
| 1. Plastikmodellbauclub Nürnberg e.V. |
| back to Modellfotos 3 | back to homepage | |
| Model and photos by Wilfried Eck |
|
|
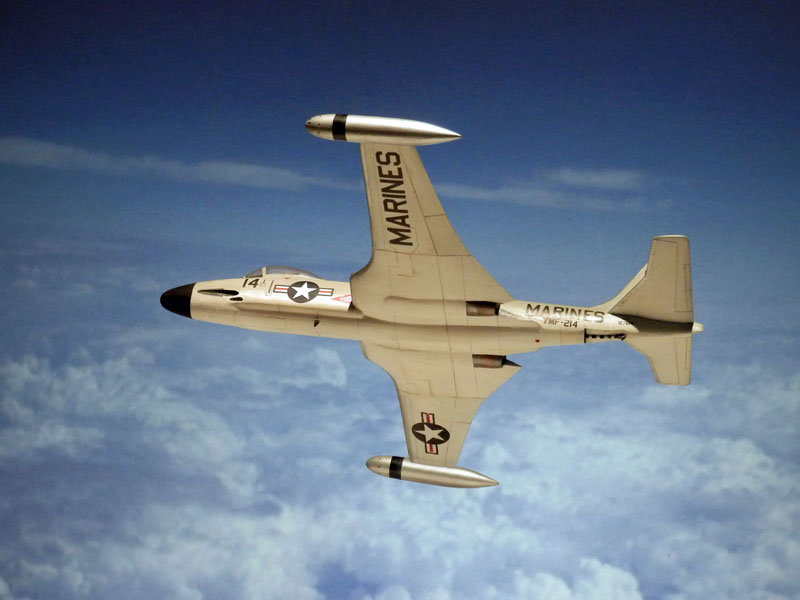
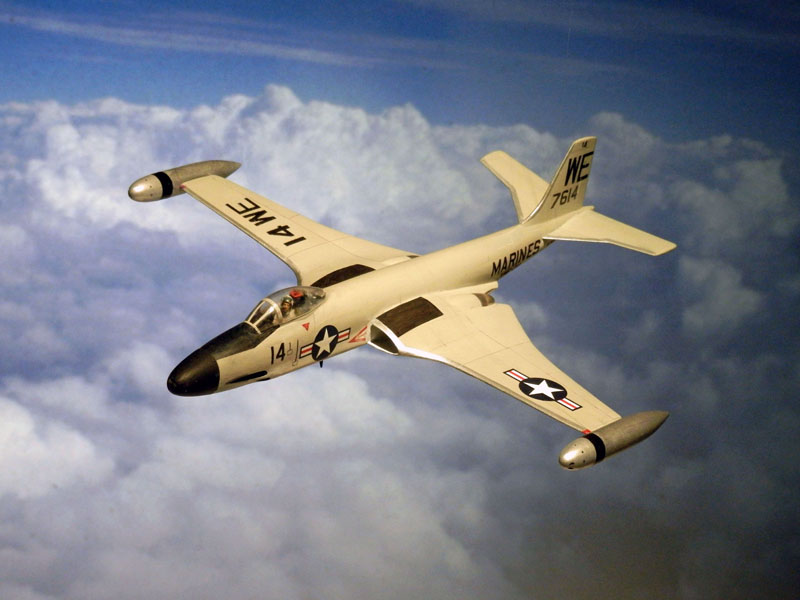
| McDonnell F2H-4 "Banshee", Academy 1/72 | |
| VMF-214 "Black Sheep", 1953 - 1957 Ewa, Hawaii |
The original:
The F2H Banshee ("specter of death") had been designed in
1945 as a further development of the FH "Phantom", but the result was a
completely new aircraft. In view of the low approach speed for carrier landings,
it still had unswept wings, but now with four low-lying 20 mm guns to prevent
glare and an air-conditioned pressurized cabin with ejection seat. With two more
powerful Westinghouse engines, the new F2H-2 multirole fighter achieved a climb
rate of 9,000 ft/min (2,700 m/min) on its first flight on Jan. 11, 1947, twice
as fast as the F8F Bearcat. External loads could be carried on four optional
hangers behind the air intakes (including atomic bombs inboard), and removable
external tanks. The F2H-2P reconnaissance version had a particularly elegant
appearance due to its extended nose section. The later versions F2H-3 and -4 -
also with photo version - differed however both from the external appearance and
internally clearly from the earlier F2H-2, still used in the Korean War.
Banshees replaced the Grumman F9F-5 "Panther" and were replaced in turn in 1961
by F9F Cougar and FJ-4 Fury. 39 used aircraft went to the Royal Canadian Navy.
The model:
 |
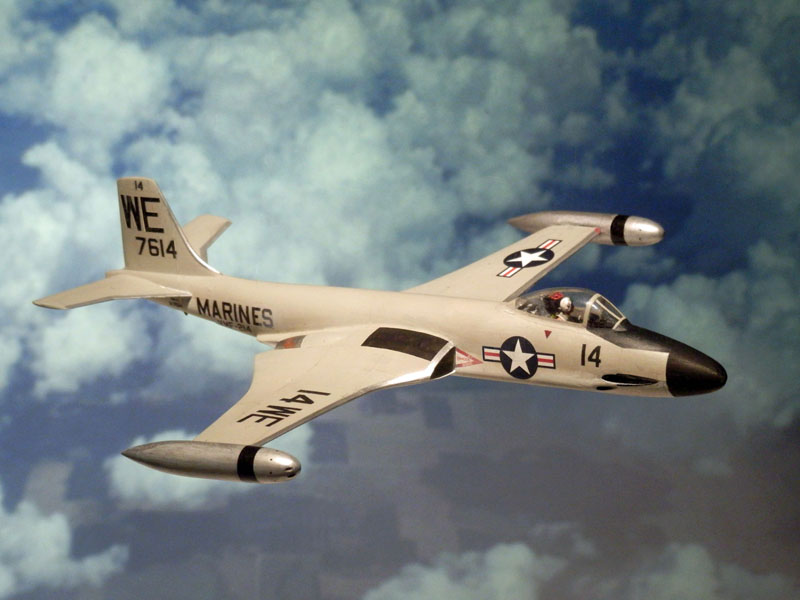
My last model I wanted to build quite simply "just so", without having to pay attention to kit errors, coarsening and refinements. By chance I came across the "Banshee" kit from Academy at the time, before Corona. 1/72 was not planned, but because I had never seen a kit of the F2H-3/-4 (externally identical) at that time, access was announced. I didn't have too high expectations, but what I saw was quite decent, the shape could convince and the extensive decal sheet from cartograf even more. Four US Navy versions, three Royal Canadian Navy aircraft, all correctly printed, the US insignia even in correct blue-black and not light blue as otherwise unfortunately too often seen. Later processing very well.
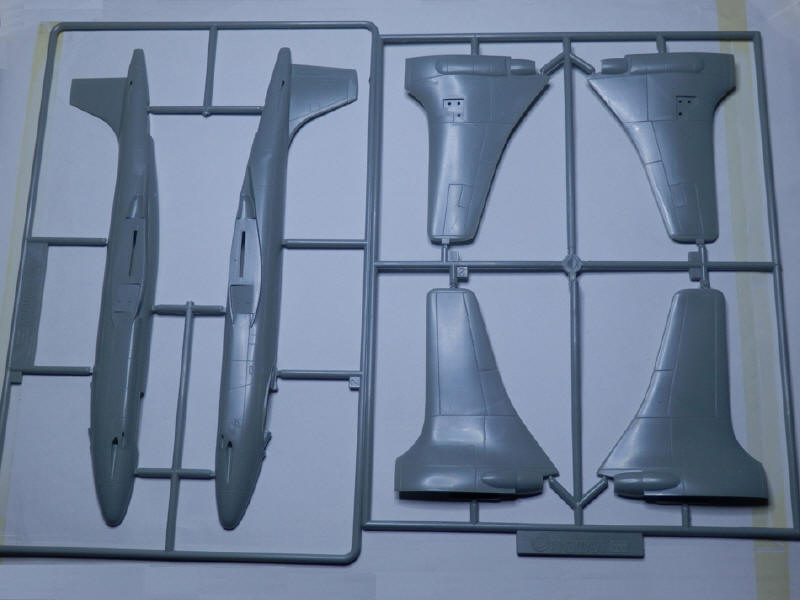 |
On closer inspection, however, the reproduction of panel lines - especially on the wings - turned out to be too obvious for my taste. As you can easily see from photos, the real machine was smooth as an eel, at most something was visible on the undersides of the wings. So they were I filled and sanded and, as a concession to the taste of model builders, after applying the paint, I used the Herbert Kruse method to add some fine pencil strokes where necessary (only visible at the bottom of the photos).
Unfortunately, I could not resist taking a closer look:
|
|
As a result, even if you could get an ejector seat from Pavla (FJ-4 Fury would also fit), there is still a lot to do yourself, needed resin parts are missing. Even if you don't need it exactly, the model wins if you detail the cockpit a bit and position the tanks lowered at the wingtips.
|
|
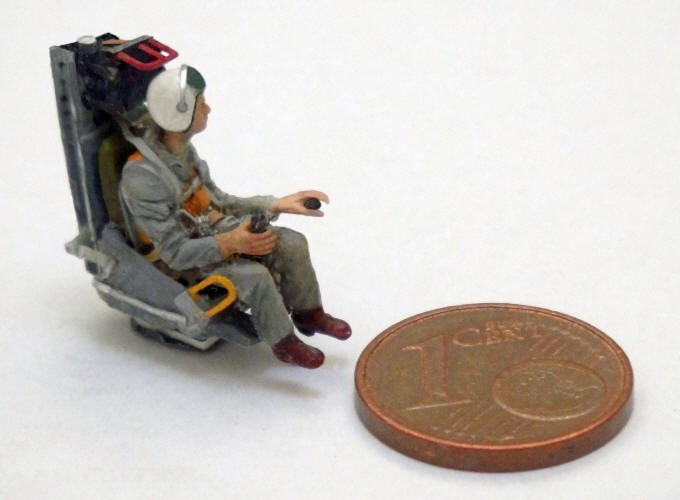
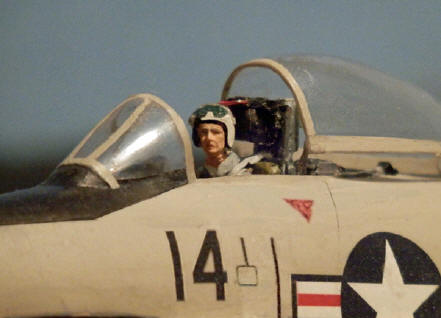
How to get a pilot figure when there is none:
For the intended "flight shots, a pilot was of course required, but I didn't
have a suitable 1/72 figure. But like my other self-made figures, this is no
problem in principle, if you find a usable head with neck as well as hands and
make the rest as it should look. The head with neck in this case was supplied by
a soft plastic RAF ground crew figure, the helmet was molded/sanded from
polyester putty, visor aluminum foil. The rest was not made by altering other
figures, because that will never work, because every movement is communicated to
the whole body. My pilot was supposed to look for the next taxiway after landing,
so he turned slightly to the left with his shoulder slightly hanging. He was
made as usual from plastic sheet of suitable thickness, torso parts, arms and
legs cut out, carved and sanded to fit. For hands I didn't have anything usable
and in 1/72 this can be a problem if the figure is not supposed to wear boxing
gloves but to have five fingers. But even that was doable after some thinking:
Mill three grooves in a thin strip of plastic, then soften this strip over a
candle flame and draw it thin over a suitable brush handle. Then cut off enough
on the left and right to make four fingers. The width of the hand should be
equal to the distance chin to nose tip. Which can mean "all over again" because
it got too wide or too narrow. The transition from the hand to the forearm was
created by a flat wedge-shaped beveled thicker strip glued inside, a little
longer so that you have something to hold when it comes to creating a hand with
forearm by cutting away and sanding after drying. A hand normally extends from
the chin to almost the hairline. The thumb was created by thinly drawn round
material, cut off at an angle at the stronger end and set with "plastic paste" (plastic
chips softened to mush in liquid glue). What protrudes is used for matching,
because the transition to the hand is smooth. It is strongly recommended to take
the diameter of the control stick handle into account (my figure does not have
the first hand!). Once you've decided how much forearm should stick out of the
jacket, it does well to taper the end part, it helps to fix the part in a recess
in the forearm. Butt gluing can cause the hand to lower during drying, which
gives quite unnatural posture. The same applies to the left hand, of course.
Whether to put the hands in the arms right away or only after the arms have been
attached is a matter of taste. According to the experiences made, one should
first finish the fuselage with harnesses and other equipment and then attach the
arms with their hands incl. control stick etc.
| Since the ejection seat from Academy was unusable and a pilot would not fit in the Pavla seat, the ejection seat was made parallel to the figure so everything would fit together. Basically the same as with the T2V Sea Star model (except the ejection handles which were made from thin brass wire). |
| Because the frames of the cockpit canopy protruded excessively, making an own canopy was inevitable. |
| I don't believe that anyone will copy this, but perhaps it shows that model building is possible without resin and etched parts (admittedly, if there had been some I'd have used them).. |
|
|
|
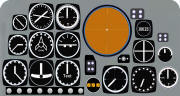
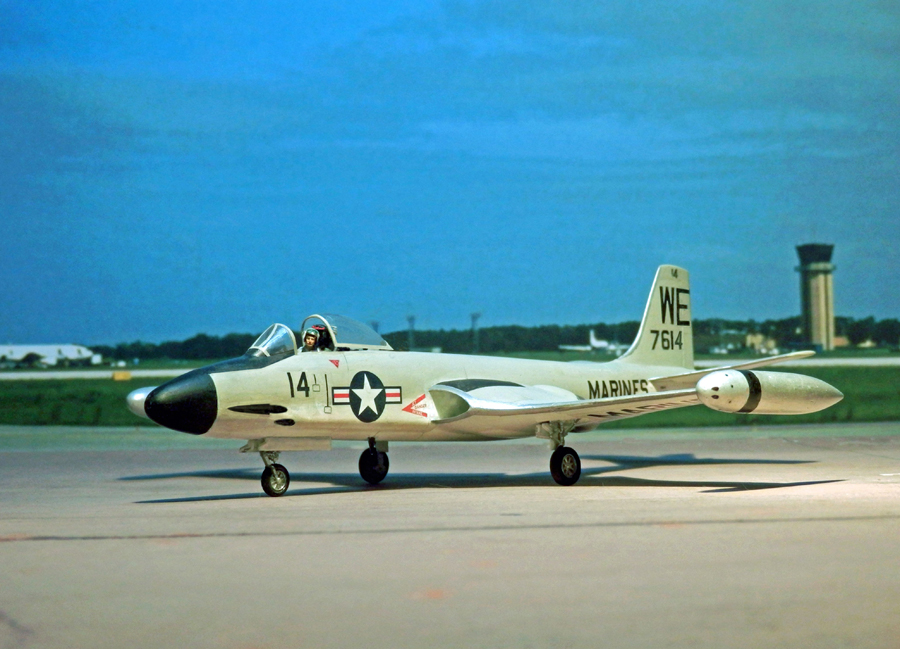
Paint: The construction plan does contain a list of which colors of which manufacturers come into question (not checked by me), but in the case of the cockpit doubtful with regard to black instrument panel and cockpit back panel in Zinc Chromate. To be on the safe side, I used the general standard - see right. To be on the safe side I followed the Bureau of Aeronautics specification of February 23, 1955 (the experimental arrangement of 1952, natural metal coated with clear varnish, had proved not to be corrosion resistant), colors as usual according to Federal Standard 595a. It should be noted that the first digit of FS 595a determines the gloss level. The 3, "non specular", therefore "not glossy", but by no means dull-matte, 2 "semi gloss" with some gloss, and 1 "glossy" more glossy, but not airshow high gloss. As a result, the gloss levels differ only minimally. In my case, after applying Vallejo paints, clear coat and decals as usual, then overcoat with two grades of semi-gloss.
|
|
As a result, thanks to the Academy, domestic obligations,
Corona and reduced desire to build, everything took much longer than planned.
C'est la vie!
|
|
Various notes on the construction of a F2H-3/4 model: http://tailspintopics.blogspot.com/2009/12/f2h-banshee-modeling-notes.html.
Nose landing gear in detail: http://tailhooktopics.blogspot.com/2019/07/mcdonnell-f2h-banshee-nose-landing-gear.html
F2H-3, -4 tank details: http://tailspintopics.blogspot.com/2017/03/f2h-34-tip-tanks.html
![]()